Mostrando entradas con la etiqueta Portfolio. Mostrar todas las entradas

lunes, 17 de octubre de 2016

Comenzamos con nuestro portafolio digital - Kidblog

Hoy vamos a aprender como utilizar nuestro Portfolio Digital. El nuestro de 5º B será: 


Para entrar a él tendremos que pulsar en la pestaña que encontraremos en el Blog que dice: KIDBLOG YEAR 5B . Nos aparecerá esa pantalla y tendremos que ira a Log In (señalado por la flecha). 


Cuando hayamos pulsado en Log In nos conducirá a esta otra pantalla donde tendremos que pulsar en "Select your name" y escribir nuestra Password. Nuestra contraseña inicial es "colegiosg" la de todos.
Una vez dentro de nuestro KIDBLOG tendremos que ir a "Perfil / Profile" para poder cambiar nuestra "password" y poner la que nosotros queramos.

Recordad lo que en numerosas veces os hemos dicho: utilizad la misma contraseña que en el EDMODO, Gmail y otros lugares, para que así no se os olvide. Si por diferentes motivos no puedes utilizar la misma, te recomendamos apuntarla en un lugar seguro. 
Para cambiar la contraseña tenéis que ir al apartado de  "Settings", y escribir la "New Password". Mirad la imagen.


En breve os explicaremos como escribir los primeros post.
Ánimo y a estrenar vuestro portfolio digital. 

jueves, 22 de octubre de 2015

How to publish a post at Kidblog (Year 5)

To begin you have to go to the blog and LOG IN with your user name and password. Here you have the last post we did about it. 


Once you are in your personal kidblog account. You have to look for NEW POST to start working. 


The first thing you have to do is choose and write the title for the post, normally we will use the one which the teachers have given you as the title of the activity. But don't hesitate to be as more creative as posible. Also you can add a header image.


The next step you will find it would be a square in which you will write the body of your post, I mean, what you really want to tell us in this post. To deal with this part is very easy because it has the same functions as it was a text processor (Underline, bold, centred text, kind of letter...). In this body for writing we should follow this pattern: 
  1. Greeting.
  2. Explanation of the task. What is the task about? 
  3. The activity (Embed the  HTML, picture, etc...)
  4. Your reflexion about the task.
  5. Farewell. 


In many occassions the post will include a Google Drive presentation, or some YouTube videos, etc. These are elements which are embed in our post through an computer programming language: It is called HTML. We will explain you how to look for this code later, because each website has a concrete way of doing it. By the moment we want to show you how to introduce in a post. 
  1. Copy the HTML code from the original website (Google Drive, YouTube, etc...)
  2. You have to put your post in HTML mode by clicking in the convenient tab (let's have a look to the following picture). 
  3. Paste the  HTML code in the correct place in which we want it to take up.  e
  4. Let's go back to the normal view of the post (Visual tab) and check if everything is ok. 


If we want to add and upload a picture in our post we will do it by clicking in UPLOAD.

The last thing we have to do before publishing our post it will be to write the TAGS. (It will help us to organize the information we are offering and it will make easier the later search). The tags will be separated by commas and following by a space. 
The TAGS will be the same for all the students. And there will be some which are the same in all the activities: 

  • colsangregorio.
  • redxxi
And there will be other TAGS which will change depending on the activity. 
  • English / Natural Science (Depending on the subject of the activity)
  • Title of the activity (For the first one it will be: My first presentation).


Finally we just have to publish it for everybody to read and see. First we will click on REVIEW and we will be able to check that everything is correct and then we will click on PUBLISH. 


Sometimes you may stop and you haven't finished the post so we will save it as a draft by clicking DRAFT. 


If you want to recover this post that you have saved as a draft first you have to click on our name to go to your dashboard and once you are in your account we will click on POSTS

Let's click on the title of the post you want to publish and it will be opened as at the beggining, so click on PUBLISH. 


martes, 13 de octubre de 2015

Comenzamos a utilizar nuestro portafolio digital - KIDBLOG

Hoy vamos a aprender como utilizar nuestro Portfolio Digital. El nuestro de 5º B será: 


Para entrar a él tendremos que pulsar en la pestaña que encontraremos en el Blog que dice: KIDBLOG YEAR 5B . Nos aparecerá esa pantalla y tendremos que ira a Log In (señalado por la flecha). 


Cuando hayamos pulsado en Log In nos conducirá a esta otra pantalla donde tendremos que pulsar en "Select your name" y escribir nuestra Password. Nuestra contraseña inicial es "colegio" la de todos.
Una vez dentro de nuestro KIDBLOG tendremos que ir a "Perfil / Profile" para poder cambiar nuestra "password" y poner la que nosotros queramos.

Recordad lo que en numerosas veces os hemos dicho: utilizad la misma contraseña que en el EDMODO, Gmail y otros lugares, para que así no se os olvide. Si por diferentes motivos no puedes utilizar la misma, te recomendamos apuntarla en un lugar seguro. 
Para cambiar la contraseña tenéis que ir al apartado de  "Settings", y escribir la "New Password". Mirad la imagen.


En breve os explicaremos como escribir los primeros post.
Ánimo y a estrenar vuestro portfolio digital. 

jueves, 4 de junio de 2015

NUESTRO ZOO AUMENTADO (Ciencias Naturales 1ºEP)

En el área de Natural Science de 1º de Educación Primaria del Colegio San Gregorio hemos llevado a cabo un PBL bajo el título: AUGMENTED ZOO.

A lo largo del mismo hemos:
  • Aprendido sobre los animales, sus características y clasificación.
  • Representado gráficamente nuestro conocimiento.
  • Descubierto lo que es y supone un código QR.
Tras haber trabajado y aprendido sobre los animales, decidimos representarlos en un mapa conceptual que nos ayudase a realizar la tarea posterior de descripción.


Después comenzamos con nuestra tarea - producto final. Teníamos que completar una ficha con las características y descripción de nuestro animal preferido.  Con nuestra ficha ya elaborada nos grabamos unos a otros describiendo nuestros animales. 


En la siguiente lista de reproducción podéis ver todos nuestros vídeos, nos esforzamos mucho para pronunciar bien y explicarnos lo mejor posible. 


Después generamos los códigos QR de cada uno de nuestros vídeos. En los siguientes documentos están todos nuestros códigos. 


Con los códigos ampliamos nuestro portafolio de lenguas, así no sólo podremos leer nuestro trabajo sino también escucharemos nuestros vídeos sobre el trabajo. Y así es cómo creamos unos pósters grandes con nuestros ZOOS AUMENTADOS: en las que a través de nuestro dibujos os ofrecemos mucha información sobre los diferentes animales. 


Por último disfrutamos probando nuestros códigos e invitamos a nuestras familias a visitar y aprender con nosotros y de nuestros trabajo.

miércoles, 25 de marzo de 2015

Los alumnos de 1º comienzan a utilizar CÓDIGOS QR

Como en cada unidad didáctica nuestros alumnos de 1º han realizado su actividad para ir ampliando su PORTAFOLIO. Un portafolio en el que los alumnos van acumulando evidencias de su aprendizaje en las áreas de Inglés y Science.

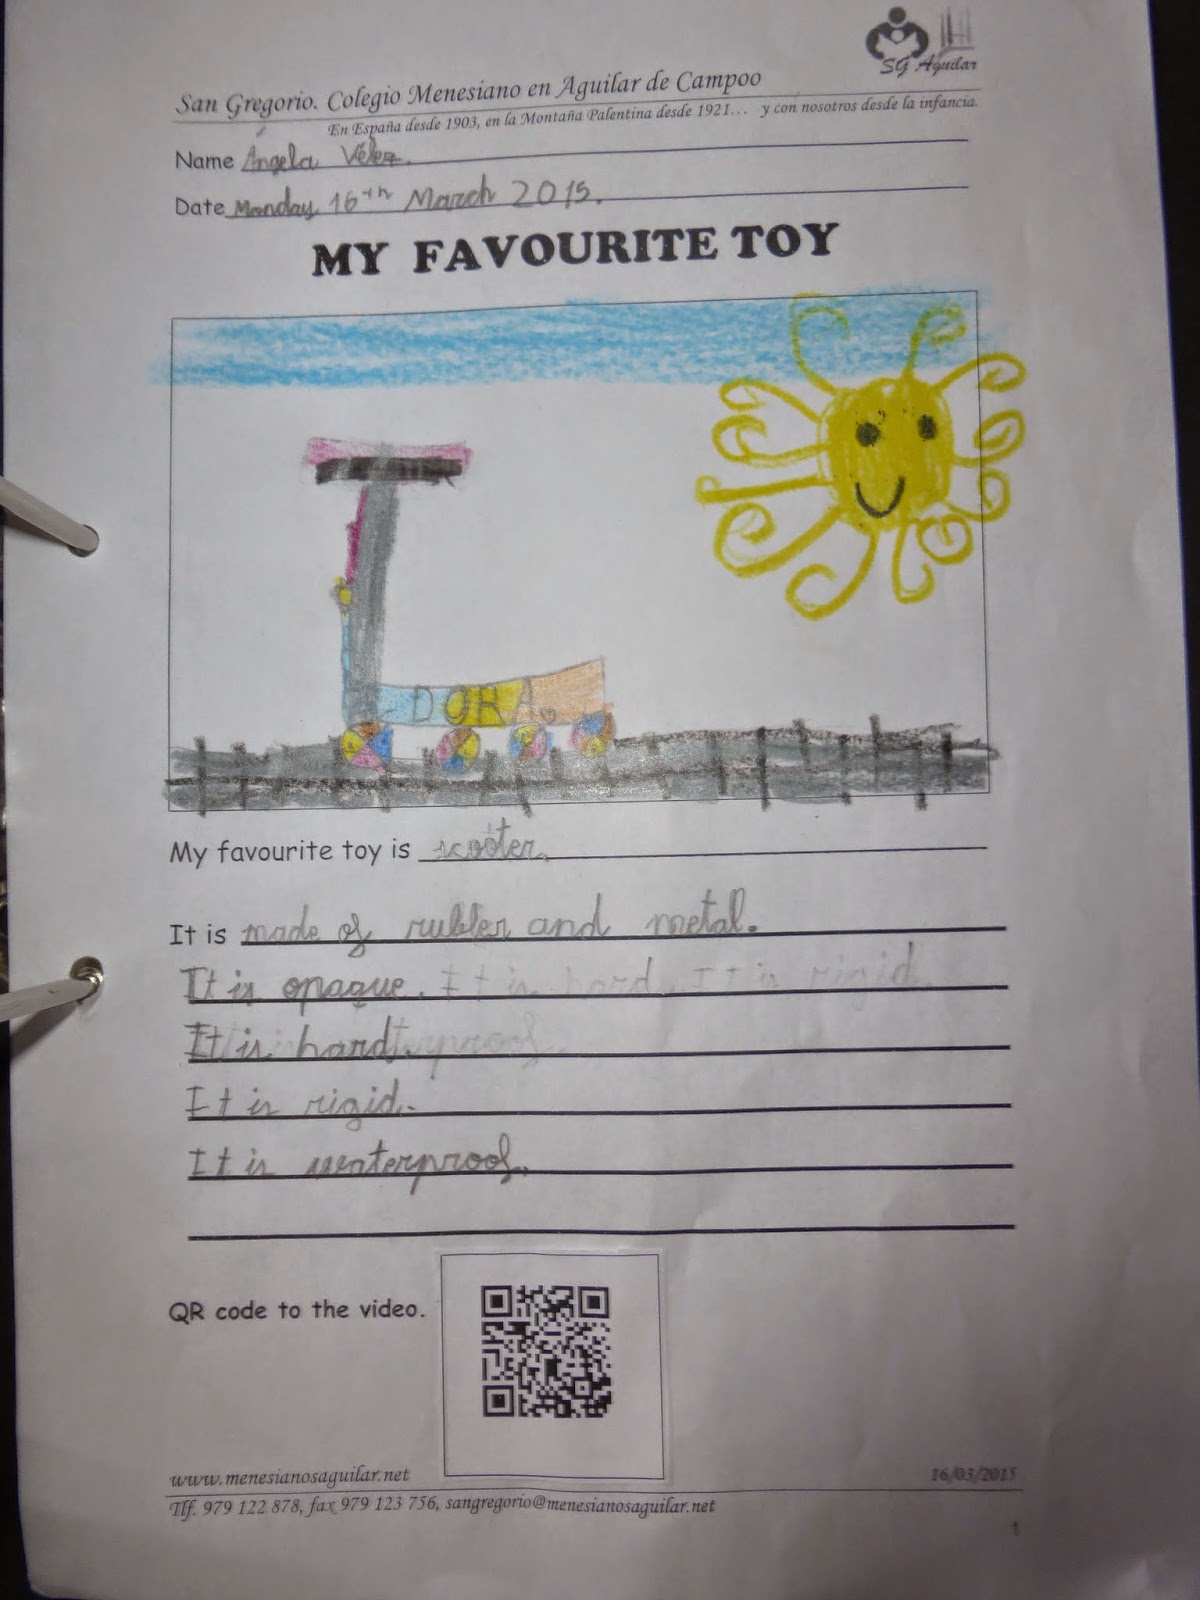
Esta vez el tema que nos ocupaba en Science eran los materiales y las propiedades de los mismos. Y en el área de Inglés trabajamos los juguetes. Así pues a los alumnos se les planteó la actividad: MY FAVOURITE TOY. La cuál realizaron con la siguiente ficha.


En la misma ficha tenían que dibujar su juguete preferido y describirle utilizando:
  • It is (y las diferentes propiedades: transparent, opaque, rigid, soft, hard, flexible, waterproof)
  • It is made of (metal, fabric, rubber, glass, plastic, leather...)
Una vez terminados los trabajos los alumnos se grabaron por parejas: uno de ellos era el cámara y el otro hablaba acerca de su juguete.


A través de nuestro gestor educativo, los alumnos de forma personal y con ayuda del profesor mandaron un mensaje a sus padres con la dirección del vídeo. 

Y esta vez quisimos tener la oportunidad de convertir nuestro portafolio de papel del aula en un portafolio digital. Que cuando volvamos sobre los aprendizajes de los alumnos no sólo leamos sino que podamos escucharles. Para ello realizamos y explicamos a los alumnos que era un código QR y para qué servía.


Cada alumno pegó un QR en su trabajo para poner en el portafolio y otro en un póster que creamos juntos para que en el pasillo del colegio la gente pueda disfrutar de su trabajo también.


Por último disfrutamos mucho probando cómo funcionan los código usando un móvil. 


jueves, 12 de febrero de 2015

Un portfolio para nuestro intercambio.

Este año estamos llevando a cabo un proyecto e-Twinning con tres colegios europeos:


  • Inglaterra: Holy Trinity Pewley Down School, Guildford


  • España: Colegio San Gregorio, Aguilar de Campoo


  • Polonia: Zespol Szkolno - Przedszkolny nr 3 im. Jana Pawła II, Rybnik

  • El proyecto lleva por título: "A touristic guide of our town". En los siguientes links podéis ver el trabajo que se está llevando a cabo.


    Los alumnos del Colegio San Gregorio tendrán la suerte de disfrutar de un intercambio con el colegio británico entre los día 2 y 6 de marzo. Ayer comenzamos a preparar ese momento con los once alumnos que viajarán. 

    Este año hemos decidido realizar un portafolio de aprendizaje sobre el viaje. Los objetivos del mismo son: 
    • Implicar al alumno en la preparación del viaje.
    • Hacer del intercambio sea un momento de aprendizaje y reflexión.
    • Desarrollar la autonomía del alumno.
    El documento que hemos elaborado es el siguiente. Hemos comenzado a trabajar con él aquí en el aula y continuaremos trabajando con él a lo largo del viaje y la vuelta del mismo. Además hemos pedido a los chicos que lleven ese documento en un plástico que les permita ir añadiendo evidencias a lo largo del viaje (mapas, panfletos, trabajos realizados en el colegio....) Esperamos que NUESTRO PORTAFOLIO DEL INTERCAMBIO, haga que reflexionemos más acerca de las mil y una experiencias que viviremos esos días. 


    viernes, 7 de noviembre de 2014

    How to write and publish a post in our DIGITAL PORTFOLIO (Kidblog)

    To begin you have to go to the blog and LOG IN with your user name and password. Here you have the last post we did about it. 


    Once you are in your personal kidblog account. You have to look for NEW POST to start working. 

    The first thing you have to do is choose and write the title fo the post, normally we will use the one which the teachers have given you as the title of the activity. But don't hesitate to be as more creative as posible. 

    The next step you will find it would be a square in which you will write the body of your post, I mean, what you really want to tell us in this post. To deal with this part is very easy because it has the same functions as it was a text processor (Underline, bold, centred text, kind of letter...). In this body for writing we should follow this pattern: 
    1. Greeting
    2. Explanation of the activity. What is the activity about? 
    3. The activity (Embed the  HTML, picture, etc...)
    4. Farewell. 


    In many occassions the post will include a Google Drive presentation, or some YouTube videos, etc. These are elements which are embed in our post through an computer programming language: It is called HTML. We will explain you how to look for this code later, because each website has a concrete way of doing it. By the moment we want to show you how to introduce in a post. 
    1. Copy the HTML code from the original website (Google Drive, You Tube, etc...)
    2. You have to put your pos in HTML mode by clicking in the convenient tab (let's have a llok to the following picture). 
    3. Paste the  HTML code in the correct place in which we want it to take up.  e
    4. Let's go back to the normal view of the post (Visual tab) and check if everything is ok. 


    If we want to add and upload a picture in our post we will do it by clicking in UPLOAD/INSERT MEDIA
    The last thing we have to do before publishing our post it will be to write the TAGS. (It will help us to organize the information we are offering and it will make easier the later search). The tags will be separated by commas and following by a space. 
    The TAGS will be the same for all the students. And there will be some which are the same in all the activities: 

    • colsangregorio.
    • RedXXI
    And there will be other TAGS which will change depending on the activity. 
    • English / Science (Depending on the subject of the activity)
    • Title of the activity (For the first one it will be: My first presentation).

    Finally we just have to publish it for everybody to read and see. First we will click on PREVIEW and we will be able to check that everything is correct and then we will click on PUBLISH. 


    Sometimes you may stop and you haven't finished the post so we will save it as a draft by clicking SAVE DRAFT. 


    If you want to recover this post that you have saved as a draft first you have to click on our name to go to our account and once you are in your account we will click on REVIEW POSTS
    Let's click on the title of the post you want to publish and it will be opened as at the beggining, so click on PUBLISH.