Con mucha alegría, ilusión y ganas vuelvo a retomar la idea de ir recogiendo mi trabajo en este blog, que hacía ya un tiempo había dejado parado. No sé si es buena la idea de hacerlo a final de curso, pero bueno esperemos que tenga esa fuerza de voluntad necesaria para ir actualizándolo con cierta regularidad.
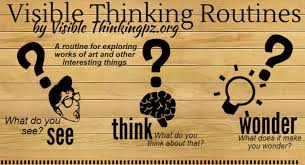
En esta entrada me gustaría mostrar el organizador gráfico que hemos realizado para llevar a cabo un Destreza de Pensamiento con nuestro alumnos de Primaria. A través de este organizador gráfico hemos querido ayudar a nuestro alumnos a reflexionar acerca de todo el aprendizaje que han llevado a cabo en un área determinada.
Llegando el final de curso, es conveniente revisar, pero es bueno hacerlo de una manera formativa, no de forma fiscalizadora.
A través del trabajo de esta destreza los alumnos:
Reflexionarán acerca del camino que han seguido.
Serán conscientes de sus avances, así como de su carencias.
Recordarán el curso y el aprendizaje de una forma global.
Como docentes nosotros:
Podemos evaluar el grado de adquisición general de los contenidos del área.
Descubriremos aquellos aspectos necesarios de afianzar de cara al siguiente curso.
Debemos autoevaluarnos en función del aprendizaje que han llevado a cabo nuestros alumnos.
Os dejo por un lado el organizador gráfico por si os puede servir (recordad que si lo compartís o usáis, debéis de citar la autoría del mismo), así como algunos de los organizadores completados por nuestros alumnos en el Colegio La Mennais - Aguilar de Campoo.
We are going to create and investigate about the history of different inventions. First of all we are going to think on different daily machines you want to investigate about.
In groups of four we are going to do the Cooperative Learning Technique: SPIN THE SHEET, and in the paper we are going to write down different invention which are important in your daily life.
Then a member of each group will read your ideas for everybody and then we will decided the most important ones and in pairs you will investigate about it and complete the worksheet.
With all the worksheet we are going to order them into a TIME LINE.
WOULD YOU LIKE TO BECOME AN INVENTOR?
Let's invent something and draw a prototype into your Arts and Craft book. Then you have to explain your mates how it works and what are you going to use it for.
Today we are going to work with our hands the topic of stuctures. First of all I want you to remind the definition of a structure, let's share it with you cooperative group.
The resistant of the structure depends on the material and the shape.
Let's think on different structures you can have around you in your daily life. We are going to do it using a Cooperative Learning Technique: Let's spin the sheet. Think on one structure: the name of it and a picture. Use your notebooks so at the end each member of the group will have the fourdifferent structures. In the following presentation you will know how to work with this technique.
BRIDGES
Let's have a look to the following video, along it you will have some questions to answer it. It will be an assesment tool, but for that you have to register on EDpuzzle. To join your class you can use Edmodo user and password. We have created two classes, enter the code to join them:
We are getting the end of or project so we are nearly ready to prepare the final product our Zoo, our Augmented Zoo. First of all we are going to visit a zoo with a song, let's think on the animals we can find in a Zoo.
We are going to identify most of the animals we have watched on the video and then we will classify some of them into the following worksheet.
STEP 1: Join your THINKING TWIN. Tell him or her which your favourite animal is.
STEP 2: Work with your THINKING TWIN. Tell him or her what you are going to write in the different part of the chart:
COVERING: fur, feathers, scales, moist skin.
BORN: Viviparous - Oviparous.
LIVE: in the farm, in the forest, in the sea......
EAT: Carnivore, Herbivore, Omnivore.
STEP 3: Think on different sentences about you animal using:
It is ..........
It has.........
STEP 4: Draw a picture about your animal in the rectangle which is in the upper part of the worksheet.
STEP 5: Time for writing all this information little by little in you worksheet.
STEP 6: Let's check with you THINKING TWIN everything is correct.
When we finish we are going to record videos about our animals and create the QR codes, using the QR-code extension for Google Chrome.
CREATING THE ZOO
Let's draw a wonderful picture of your animal and we are going to stick all of them in a big poster with all the paths and roads of the zoo. Near the picture you are going to stick the QR codes. And invite your parents to have a look to our final product.
Today in our Augmented Zoo project we are going to work a bit of Maths and we are going to work on how to create a graph to represent the results of some questions.
We are going to investigate about pet, these are the animals that we can have at home living with us. The following song will help us to learn the vocabulary.
Which animal names do you listen in the song?
Now it is time to work with our THINKING TWINS. You will have two rectangles in which you are going to record the answers of the questions. We are going to work on these questions:
Do you have a pet?
Yes: Green square and the name.
No: Red square and the name.
Which is your favourite pet?
Dog: brown square and the name
Cat: grey square and the name.
Turtle: green square and the name.
Fish: orange square and the name.
Bird: blue square and the name.
With your rectangles you are going to create the graph with your classmates in a big poster.
After learning what a living or a non-living things are, it is time to focus our attention into one of the biggest groups of living things: THE ANIMALS.
To start with this part of our project we are going to work first our communicative skills, we are going to introduce a new question to our daily routines.
WHAT IS YOUR FAVOURITE ANIMAL?
My favourite animal is................
With your THINKING TWIN you are going to talk and finally you will introduce HIS or HER favourite animal.
For describing the animals we need to know which the different parts of the body are. Do you think animals have legs, eyes, nose.......? Yes, they have. Let's learn a bit more about the vocabulary with the following presentation.
Now it is time to play with your Thinking Twin. Your teacher will leave some worksheets on the table with the labels, you have to label the pictures. You can only go to other table if the teacher has checked everything is correct.
With the following book we are going to discover the different animal covering.
What does an animal have around the body?
Do all of the animals have the same around their body?
Let's practice what you have learnt about the different body coverings by labelling the different animals we worked in the previous activity. Using the words: FUR, SCALES and FEATHERS.
To sum up the whole lesson you are going to draw your favourite animal and label the main parts of it. You will also complete two sentences. Let's use the following worksheet for that purpose.
Along this month we are going to start a new project for Year 1 at Colegio San Gregorio. It is titled: My Augmented Zoo, the final product will be a big poster in which the students will talk about their animals.
To start with we are going to start learning about things, and the characteristics of Living and Non-living things. Let's enjoy the following song and discover the three main characteristics of each group of things:
When we discover the three main characteristics we will try to use our ideas in different things classifying into groups the given flashcards, we will give reasons for each one.
In the following worksheet we are going to show our learning along this lesson.
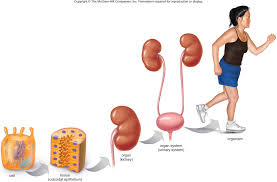
Along this topic we have learn about the living things and the cells. Today we want to learn a bit more about the organization of cells. If we focus our attention in the cells we can classify the organisms into MULTICELLULAR and UNICELLULAR.
Let's have a look to this video and at the end of the video in the group you have to create a definition about what a multicellular and an unicellurar is.
Living things that are composed of two or more cells are called multicellular organism. All the cells are arranged so that the organism can performed the vital functions.
LEVEL 1: It is the single cell.
LEVEL 2: Tissues. They are a set of one type of cells which performs the same function.
LEVEL 3: Organs. The grouping together of a set of tissues which performs the same function.
LEVEL 4: System. Some organs that perform the same function are grouped together in a same system.
All the systems perform the ORGANISMS
Let's practise a bit more about Organization of Living Things using this video and the following test.
Muscle cellsare elongated. These cells and the tissues can expand and contract. This allows muscle to move.
Epithelial cells: These flat cells line certein area of the body such all the skin. They insulated the body and protect it.
Nerves cells: They are star shaped with long extension or arms. These cells establish connections and then transmit information to all parts of the body
To sum up and internalise your knowledge along this lesson you are going to create a model explaining from the cells to the organism. Let's use plasticine to create the model and paper to label it. Take a picture of it to publish it.
What do you have to do? Create a model using plasticine and paper to reproduce this photo.
STEP 1: Decide with your mates what you are going to represent. Let's investigate how it is and how to represent.
STEP 2: Talk with your mates about the material you will need and how do you will organize to have it (plasticine, sticks, papers, and if it is posible a camera to take a photo)
STEP 3: Organize the group deciding who is going to do each things, who is going to create the cell, who the tissue, the organ,.....
STEP 4: Work on your part of the task, don't hesitate to ask for help to your mates in case it is necesary.
STEP 5: Let's prepare the final model and take a picture and send it to your teacher.
STEP 6: Each group will show the final product to the rest of the groups.
It will be esier for you to talk in front of your mates if you have a script to follow. The following sentences would be helpful for you.
Hello, we are........
We are going to present you the .......levels of organization of the human body.
The first level is the ......................
All the .............together form the 2nd level which is..................
The ............... together form the 3rd level which is the..............
The ................., ..........................., .......................... are the different organs for the .......................... system. Explain you system, you can use your own information or you can have a look to page 14 and 15 of your book.
The ...................... system with the ...................system, the ............system, the ... system, the ... system and the .............................system form the HUMAN BODY.
STEP 2: Answer the following questions in your groups.
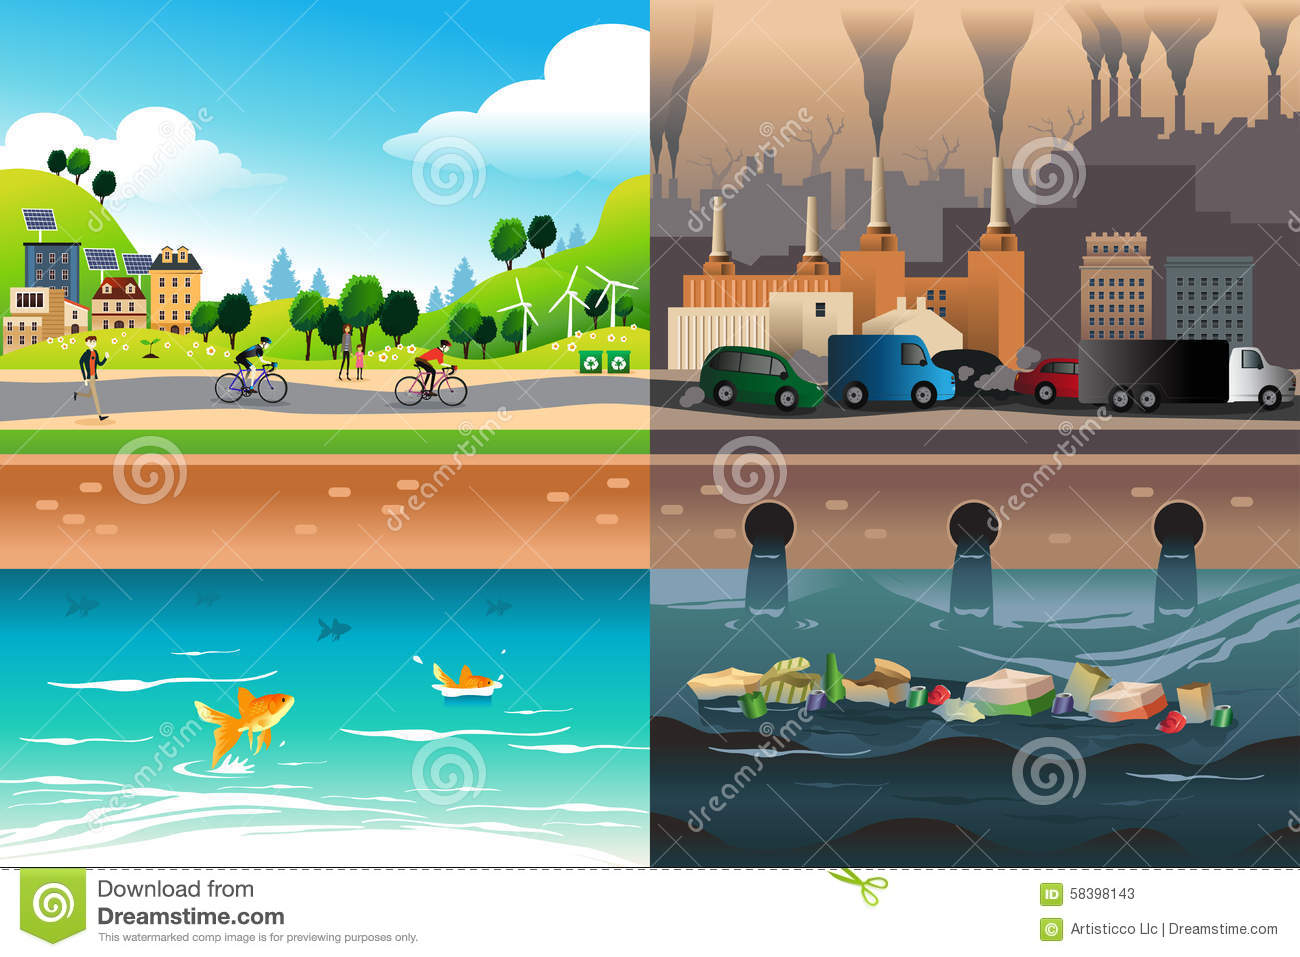
Do only big factories pollute?
Do I pollute at home?
How do I pollute in my daily life?
Let's answer different ways you can pollute or you can observe around you. To answer these questions we are going to use a Cooperative Learning Technique:
The Recorder of the groups will read the final conclusions to the rest and the teacher will write them on the blackboard.
STEP 3:With the Cooperative Learning Technique:THINK – PAIR – SHARE the student will look for some actions to do in order to solve the problems the have discovered in the previous part. We need to finish with at least 10 different actions.
THINK: Each member of the group think on possible actions. (1 minute)
PAIR: The two pairs of the group will talk and look for common actions (2 minutes)
SHARE: The four members of the group will talk and look for some actions the think are great (4 minutes) the recorder will write down on a paper.
With all of them we will create a final decalogue.
STEP 4:Each group of four will have an action of the ten to represent and record a short video using Touchcast with the minIpads. So the student will have to write a short script about what will be in the video and which photo will they use to record it.
The video should have three very short parts:
A situation explaining a wrong action.
A situation explaining a good action.
The sentences from the decalogue.
For example:
We are at home eating the afternoon snack, when the boy finishes the juice throws it to the paper bin. The mum explains he has to recycle it and he has to throw to the yellow bin. And then you say the sentences about the decalogue.
GRAMMAR TIPS:
Remember to use the grammar about the present simple CB 145.
STEP 5:Recording the videos at the Image Lab.
STEP 6:Along these step the groups will have different task to do.
One group will create the final video using all the videos of the groups. They can useWeVideo.
Another group will create an Infography with the points of the decalogue. They can usePiktochart.
Another group will create the aura (photo or picture) and learn how to work withAurasma.
Another four groups will create a Google SlideShow presentation, a very short one to explain kids from Year 1 and Year 2, good practices on the recycle topic. One group will divide themselves and each member will go to these four groups.
ASSESMENT
Teacher's assesment (60% of the final mark) Maximum 24 points.